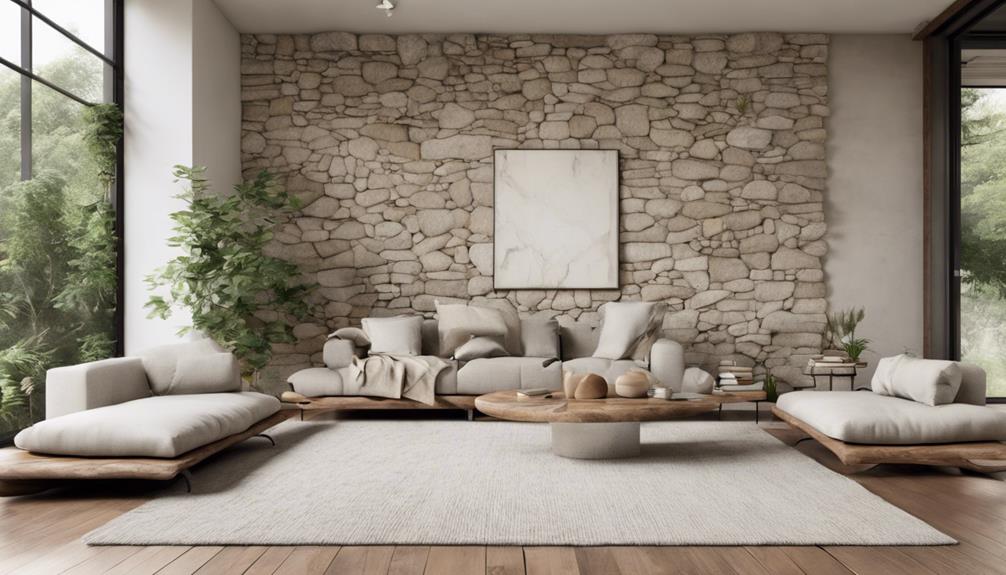
If you're looking to transform your home instantly, consider revitalizing your walls with a bold paint color or creating custom shelving units for extra storage and style. Upcycling old furniture can add a personal touch, as a statement light fixture boosts ambiance. Don't forget about curb appeal—simple landscaping changes like colorful blooms or a new front door can make a huge difference. For outdoor fun, building a DIY fire pit creates a cozy gathering space. The possibilities are endless, and you'll find even more creative ideas that can enhance your home's look and feel.
Refresh Your Walls With Paint
If you're looking to breathe new life into your space, painting your walls is one of the easiest and most impactful DIY projects you can tackle. The right color can transform a dull room into a lively oasis, so why not explore the latest paint color trends? Shades like deep emerald green, warm terracotta, and soft pastels are making waves this year, offering fresh alternatives to traditional neutrals.
But don't stop at color alone; consider incorporating wall texture techniques to enhance your design even further. Techniques like sponging, rag rolling, or even stenciling can add depth and interest to your walls, turning a simple paint job into a standout feature. Experimenting with texture can give your space a unique character that reflects your personal style.
Before you start, prep your surfaces properly. Clean, patch, and prime your walls to guarantee a smooth application. Once you're ready to go, grab those brushes and rollers, and let your creativity flow. You can create an accent wall in a bold hue or opt for a soft gradient for a more subtle approach.
Don't forget to play with finishes too! A satin or eggshell finish can add a touch of elegance, whereas a matte finish may evoke a more modern, minimalist vibe. With some imagination and a few hours of work, you can refresh your walls and make a statement that resonates throughout your home. Your walls are your canvas—make them uniquely yours!
Create Custom Shelving Units
When you're ready to create custom shelving units, choosing the right materials is essential for both durability and style. Think about how the design and layout will fit your space and meet your needs. This approach guarantees your shelves not only look great but additionally serve their purpose effectively.
Choosing Materials Wisely
Choosing the right materials can make all the difference in creating custom shelving units that are both functional and stylish. When you explore your DIY project, consider sustainable sourcing. Opting for reclaimed wood or eco-friendly materials not only benefits the environment but adds unique character to your shelves. Plus, these materials can often be more affordable than new alternatives.
If you're on a budget, explore budget-friendly options like plywood or MDF. These materials are easy to work with and can be painted or finished to match your aesthetic. For a modern twist, consider using metal brackets or pipes, which can give your shelving a sleek, industrial vibe without breaking the bank.
Don't forget about the finishing touches! Look for low-VOC paints or stains to maintain a healthy indoor air quality while still achieving that polished look. By thoughtfully choosing your materials, you'll create custom shelving units that not only elevate your space but reflect your innovative spirit and commitment to sustainability. So, roll up your sleeves and start transforming your home with materials that speak to your style and values!
Design and Layout Tips
Creating custom shelving units involves more than just the right materials; it's all about effective design and layout. When you're planning your shelving, consider how it can improve the overall room flow and support your functional zones. Thoughtful space planning will guarantee your custom shelves fit seamlessly into your existing furniture arrangement, optimizing your spatial dimensions.
Here are some tips to keep in mind:
- Establish a visual hierarchy by varying shelf heights to draw the eye.
- Incorporate an aesthetic balance by mixing decorative items with functional storage.
- Consider the color scheme of your shelves to complement or contrast with your room's palette.
- Boost lighting design to spotlight your shelving, creating a more inviting atmosphere.
- Be mindful of traffic patterns, confirming easy access to your shelves without hindering movement.
Upcycle Old Furniture
Upcycling old furniture breathes new life into pieces that may seem worn or outdated, turning them into unique treasures for your home. You don't need to be a professional to initiate this creative expedition—just a vision and a bit of elbow grease. Start with furniture painting; a fresh coat of paint can completely transform your piece. Choose bold colors or soft pastels to match your style. Don't shy away from patterns or techniques like distressing for that charming vintage look.
Once your furniture's got a new hue, consider tackling the upholstery. Creative reupholstery can add personality and flair to otherwise drab chairs or sofas. You can easily find an array of fabrics that suit your taste, from lively prints to subtle textures. Remove the old fabric, and with a staple gun and some basic sewing skills, you'll have a stunning piece that feels fresh and inviting.
Think beyond traditional uses for your furniture, too. An old dresser can be turned into a chic bathroom vanity, or a coffee table could become a stylish bench. The possibilities are endless when you let your imagination take the lead.
Engaging in these upcycling projects not only improves your living space but additionally allows you to express your creativity during this eco-friendly process. So grab your tools, let your ideas flow, and start giving your old furniture the makeover it deserves!
Install a Statement Light Fixture
A statement light fixture can instantly improve the ambiance of any room, adding both style and personality to your space. Whether you're aiming for a modern look or a vintage vibe, the right fixture becomes a focal point that transforms your decor. Here are some popular statement lighting styles you might consider:
- Chandeliers: Perfect for dining areas or entryways, they add elegance and grandeur.
- Pendant Lights: Versatile and stylish, these work well over kitchen islands or breakfast nooks.
- Sconces: Wall-mounted fixtures that bring character as they save floor space.
- Floor Lamps: Ideal for reading nooks or living rooms, they provide both light and style.
- String Lights: Great for creating a cozy atmosphere, especially in bedrooms or outdoor spaces.
When you're ready to install your new fixture, keep these fixture installation tips in mind. First, always turn off the electricity at the circuit breaker before starting. Next, gather the necessary tools like a screwdriver, wire connectors, and a voltage tester. Follow the manufacturer's instructions closely, and don't hesitate to ask a friend for an extra set of hands if needed. Finally, once the fixture is up, take a moment to step back and admire your work.
With a stunning statement light fixture, you're not just illuminating your home; you're elevating its entire aesthetic. So go ahead, embrace the innovation and let your personality shine through in your lighting choices!
Enhance Curb Appeal With Landscaping
After you've transformed the interior of your home with a striking light fixture, it's time to focus on the exterior. Improving your curb appeal with innovative gardening can make a significant impact on your home's first impression. Embrace the latest gardening trends by selecting native plants that thrive in your region and require less maintenance. Incorporating seasonal blooms adds lively color to your front yard, inviting admiration from passersby.
Consider adding vertical gardens to maximize space and create a stunning focal point. These eco-friendly gardening options not only beautify your home but also promote sustainability. Pair your plant selections with stylish outdoor furniture to create inviting spaces where you can relax and enjoy your surroundings.
To light up your garden, invest in smart garden lighting that highlights your gardening features as well as improves safety. Here's a quick guide to help you get started:
| Curb Appeal Tips | Plant Selections | Outdoor Enhancements |
|---|---|---|
| Use native plants | Perennials for color | Stylish outdoor furniture |
| Incorporate seasonal blooms | Drought-resistant varieties | Creative garden lighting |
| Add vertical gardens | Edible plants | Cozy seating areas |
| Include path lighting | Low-maintenance options | Decorative planters |
| Maintain a clean layout | Colorful annuals | Functional garden art |
Makeover Your Front Door
Your front door is the first thing people see, so why not make it pop? Choosing bold colors and adding decorative hardware can instantly improve your home's curb appeal. Let's explore how these simple changes can create a lasting impression.
Choose Bold Colors
Transforming your front door with bold colors can instantly improve your home's curb appeal. The right hue can evoke emotions and set the tone for your entire space, thanks to color psychology. Choosing a lively shade not just makes a statement but welcomes guests with open arms.
Consider these bold color options for your front door:
- Fiery Red: Symbolizes passion and energy.
- Deep Blue: Evokes tranquility and stability.
- Sunny Yellow: Radiates warmth and happiness.
- Emerald Green: Represents renewal and nature.
- Charcoal Gray: Offers a modern, sophisticated touch.
Don't shy away from bold patterns, either! A geometric design or a floral motif can raise your door's visual interest, making it a true focal point. When you choose a striking color or a unique pattern, you create an inviting atmosphere that reflects your personality and style. Let your creativity flow, and transform your front door into a stunning entryway that's sure to impress. Embrace the influence of bold colors and watch your home's exterior come alive!
Add Decorative Hardware
As you select a bold color for your front door sets the stage, adding decorative hardware can improve its overall look even further. Think of your door as a canvas—decorative knobs, stylish handles, and unique pulls serve as crucial accent pieces that can transform its character.
Explore various hardware finishes, from sleek chrome to rustic bronze, to complement your door's color. If you're leaning toward modern designs, opt for minimalist pulls that exude sophistication. Conversely, vintage accents can infuse charm and nostalgia, making your entrance feel warm and inviting.
Mix and match styles for a more eclectic approach, but verify the pieces harmonize with your door's aesthetic. Remember, decorative hardware isn't just about looks; it's functional decor that improves usability as it makes a statement.
Don't shy away from experimenting—your front door is the first impression of your home. By integrating these elements, you'll create a cohesive look that reflects your personality and style. So, go ahead and raise your front door with innovative decorative hardware that truly stands out!
Enhance Curb Appeal
A stunning front door can greatly boost your home's curb appeal and serve as a welcoming focal point. To transform your front yard, consider these innovative ideas that uplift not just your door, but the entire entrance.
- Vibrant Door Color: Choose a bold hue that complements your home's exterior.
- Elegant Outdoor Lighting: Install stylish fixtures to illuminate your entrance and improve safety.
- Thoughtful Pathway Design: Use unique materials for your walkway that lead visitors to your door.
- Seasonal Decor: Switch out your door decor with the seasons for a fresh look year-round.
- Incorporate Native Plants: Surround your door with low-maintenance, native plants that add color and texture.
Don't forget to improve your outdoor seating and fence for a cohesive look. Adding porch accessories like welcome mats or stylish house numbers further personalizes your space. With these simple yet effective changes, you'll create an inviting atmosphere that captures attention and reflects your style. Your front door is more than just an entrance; it's the heart of your home's curb appeal.
Add Decorative Molding
Decorative molding can instantly improve the aesthetic of any room, adding a touch of elegance and character. Whether you want to create a classic look with crown molding or go modern with sleek, minimalist styles, there's a molding style that fits your vision perfectly. It's all about choosing the right approach for your space.
Before plunging into installation, familiarize yourself with the various molding styles available. From the ornate details of Victorian moldings to the clean lines of contemporary profiles, each style can transform the atmosphere of your home. Once you've picked your favorite, it's time to gather your materials and tools.
When it comes to installation techniques, precision is key. Start by measuring your walls carefully to guarantee a seamless fit. Using a miter saw for angled cuts will help you achieve those sharp corners that make your molding look professional. Don't forget to secure your moldings with adhesive or finishing nails, depending on the weight and thickness of the material.
You can additionally add a fresh coat of paint or stain to make your moldings pop even more, tying them into your existing decor. Remember, the right decorative molding not just showcases your personal style but also adds value to your home. So, roll up your sleeves, get creative, and let your spaces shine with the beauty of decorative molding!
Design a Gallery Wall
Creating a gallery wall can transform your space into a personal showcase. Start by choosing artwork that resonates with you, then think about how you'll arrange it for maximum impact. Finally, don't forget to add personal touches that reflect your unique style!
Choosing Your Artwork
Choosing the right artwork for your gallery wall can transform a blank space into an enchanting focal point. Your artwork selection should reflect your personal style as it creates a cohesive visual experience. To make your gallery wall truly unique, consider these innovative tips:
- Diverse Mediums: Mix paintings, photographs, and sculptures to add depth.
- Color Palette: Choose pieces that share a common color scheme for harmony.
- Framing Options: Experiment with various frame styles—think wood, metal, or even no frame at all—to create an eclectic look.
- Size Variation: Incorporate different sizes of artwork to keep the viewer's eye engaged.
- Theme Consistency: Consider a theme, like nature or travel, to unify your collection.
Arranging the Layout
Arranging the layout of your gallery wall can be both exciting and intimidating, but with a little planning, it becomes a breeze. Start by considering the furniture arrangement in the room. Place your artwork where it complements your existing décor and improves the spatial flow. A well-thought-out gallery wall should draw the eye without overwhelming the space.
Begin by laying out your chosen pieces on the floor, experimenting with different configurations. Aim for a mix of sizes and shapes for visual interest, but maintain a cohesive theme. You might want to create a symmetrical arrangement for a polished look, or go for an eclectic style that feels more relaxed and creative.
To guarantee your gallery wall feels balanced, consider the height at which you hang your art. Aim for the center of your display to be at eye level, allowing for an inviting experience. Once you've found the perfect layout, mark the spots on the wall with painter's tape to visualize the final design. This step allows you to make adjustments without committing immediately, assuring a stunning gallery wall that transforms your space beautifully.
Adding Personal Touches
Once you've settled on a layout for your gallery wall, it's time to infuse it with your personality. This is where you can showcase your individuality and create a space that feels uniquely yours. Start by selecting pieces that resonate with you—those that tell your story and reflect your style. Incorporating personalized accents and meaningful decor will transform your wall into a true reflection of who you are.
Consider these innovative ideas for your gallery wall:
- Family Photos: Choose candid shots that evoke cherished memories.
- Art Prints: Mix and match different styles and artists for a dynamic look.
- Quotes: Frame inspiring quotes that motivate and uplift you daily.
- Travel Mementos: Display souvenirs or photos from your adventures around the globe.
- DIY Artwork: Create your own pieces to add a personal touch and showcase your creativity.
Build a DIY Fire Pit
Building a DIY fire pit can transform your backyard into a cozy gathering spot for friends and family. Envision those chilly evenings spent around a warm fire, roasting marshmallows and sharing stories. With a little creativity and effort, you can design a fire pit that not only looks great but also improves your outdoor experience.
Start by choosing a suitable location—ideally, a flat area away from overhanging branches and flammable structures. Once you've got the perfect spot, gather your materials. You can use stones, bricks, or even metal to create a stylish and durable fire pit. Make sure to follow fire pit safety guidelines, such as ensuring proper ventilation and using non-flammable materials to prevent accidents.
Next, think about seating arrangements. Comfortable seating is key to making your fire pit the go-to hangout spot. Consider building benches around the fire pit or using portable chairs that can be easily moved. Adding cushions can also increase comfort, allowing your guests to relax and enjoy the ambiance.
To add a personal touch, consider incorporating decorative elements like string lights or outdoor pillows. These small additions can uplift the atmosphere, making your fire pit the centerpiece of unforgettable gatherings.
With a little planning and creativity, you'll create a stunning and functional fire pit that brings people together and ignites a sense of community in your backyard. So grab your tools and start building—your ideal outdoor oasis awaits!
Transform Spaces With Area Rugs
How can a simple area rug completely change the atmosphere of a room? The right area rug not just anchors your space but also improves its overall aesthetic. It can introduce texture, warmth, and a splash of color that transforms an ordinary room into an extraordinary one. By experimenting with various area rug styles and color combinations, you can create an inviting ambiance that resonates with your personal taste.
Here are five innovative ways to utilize area rugs in your home:
- Define Spaces: Use rugs to delineate different areas within an open floor plan, creating cozy nooks for conversation or relaxation.
- Layering Textures: Combine different rug styles for depth. A plush area rug over a flatweave can add dimension and visual interest.
- Bold Statements: Opt for a striking pattern that draws the eye and becomes a focal point, energizing the entire room.
- Color Cohesion: Select rugs that complement your existing color palette, tying together furniture and decor for a harmonious look.
- Seasonal Switch: Change area rugs with the seasons. A lighter, airy design in summer can shift to a deeper, warmer style in winter.
Install Floating Shelves
Adding floating shelves to your home can improve your decor just like a well-chosen area rug. These sleek and modern fixtures not only provide functional storage but serve as a canvas for your creativity as well. With the right shelf installation technique, you can achieve a seamless look that raises any room.
To get started, choose your floating shelf materials wisely. Wood, metal, or even acrylic can make a striking statement, depending on your style. If you're leaning toward a rustic vibe, reclaimed wood can add character and warmth. For a contemporary touch, consider sleek metal brackets or glass shelves.
Before plunging into the installation, measure your space carefully. Decide where you want your shelves to go and how much weight they'll need to support. It helps to mark the wall with a pencil, ensuring everything's aligned perfectly. When you're ready, drill into the wall studs for a secure hold. Using a level will guarantee your shelves sit straight, avoiding any future tilting or sagging.
Once your shelves are up, it's time to style them! Incorporate books, plants, or decorative items that reflect your personal taste. With floating shelves, you're not just adding storage; you're curating a visual story that showcases your unique style. This DIY project transforms your space effortlessly, making it feel more organized and inviting. So, grab your tools and get ready to uplift your home!
Craft Unique Planters
Transforming your home with unique planters can add a splash of personality to any space. By crafting your own planters, you not just create a visual statement but additionally tailor them to suit your style. Whether you're displaying succulent arrangements or designing a lush vertical garden, the possibilities are endless. Here are some inspiring ideas to get you started:
- Mason Jar Planters: Upcycle old mason jars to create charming, rustic planters. They're perfect for small succulents and can be hung or placed on a shelf.
- Wooden Crate Vertical Garden: Stack wooden crates vertically to create a stunning garden wall. This adds dimension and is a perfect way to showcase lush greenery.
- Repurposed Teacups: Give your old teacups a second life by turning them into whimsical planters. They're ideal for small succulents and make excellent conversation starters.
- Hanging Planters: Use macramé to create stylish hanging planters. This adds vertical interest and allows your plants to cascade beautifully.
- Painted Terracotta Pots: Personalize terracotta pots with lively colors or intricate designs. This simple change can enhance your succulent arrangements and match your home's decor.
Frequently Asked Questions
What Tools Do I Need for These DIY Projects?
In regards to DIY projects, you've gotta have the right gear ready—think of it like assembling an Avengers team! Crucial tools include a cordless drill, a measuring tape, a level, and a hammer. Don't forget safety goggles! For project preparation, gather your materials and sketch a plan. This way, you'll not just streamline your efforts but also release your creative flair. So, gear up and get ready to transform your space!
How Much Time Should I Allocate for Each Project?
When you're planning your DIY projects, it's essential to allocate the right amount of time for each task. Time estimates can vary, but you should typically set aside a few hours for smaller projects and a weekend for larger ones. Consider your skill level and the complexity of the project during your project planning. By doing this, you'll stay organized and guarantee you have enough time to innovate and enjoy the process.
Can I Do These Projects Alone, or Do I Need Help?
Sure, you can tackle some solo projects, but don't underestimate the teamwork benefits! As you engage in DIY tasks alone can be satisfying, collaborating with friends often leads to faster results and fresh ideas. You'll find that sharing skills and inspiration sparks innovation, making the process more enjoyable. So, if you're feeling ambitious, grab a buddy for those bigger projects; two heads are better than one regarding creativity!
Where Can I Find Inspiration for My DIY Projects?
You can find inspiration for your DIY projects in several exciting places. Check out Pinterest boards for a visual feast of ideas. Immerse yourself in home improvement blogs or flip through DIY magazines for step-by-step guides. Online forums are great for engaging with fellow enthusiasts and sharing tips. Plus, explore Instagram hashtags related to DIY to discover trendy projects and innovative concepts. With these resources, your creativity will surely flourish!
What Are Some Budget-Friendly Options for These Transformations?
When you're looking for budget-friendly options for home transformations, consider upcycling furniture. You can turn old pieces into stunning focal points with a little paint or new hardware. Furthermore, explore budget decor ideas like thrift store finds or homemade art. These creative solutions not just save you money but likewise let you express your unique style. Embrace innovation in your space by mixing these approaches for a revitalizing look without breaking the bank.